Vickers

Vickers Hardness Testing

The Vickers hardness test is suitable for a wide range of applications, including micro hardness testing. On this page, you can find a description of the Vickers hardness test, practical information on how to apply it and a list of our micro hardness testing machines for Vickers.

The Vickers hardness test at a glance:

  • Ideal for micro hardness testing
  • Can be used for case hardness depth measurement, Jominy testing and hardness testing of welds
  • Standards: ASTM E384, ISO 6507 and JIS Z 2244
See our complete range of hardness testing machines

See our hardness testing conversion table

DEFINITION OF THE VICKERS HARDNESS TEST

The Vickers hardness test is a versatile hardness test method, used for both macro and micro hardness testing. It has a broad load range, and is suitable for a wide range of applications and materials.

The Vickers hardness test is often regarded as easier to use than other hardness tests: The process can be performed on a universal or micro hardness tester; the required calculations are independent of the size of the indenter; and the same indenter (a pyramidal diamond) can be used for all materials, irrespective of hardness.

The Vickers Hardness calculation

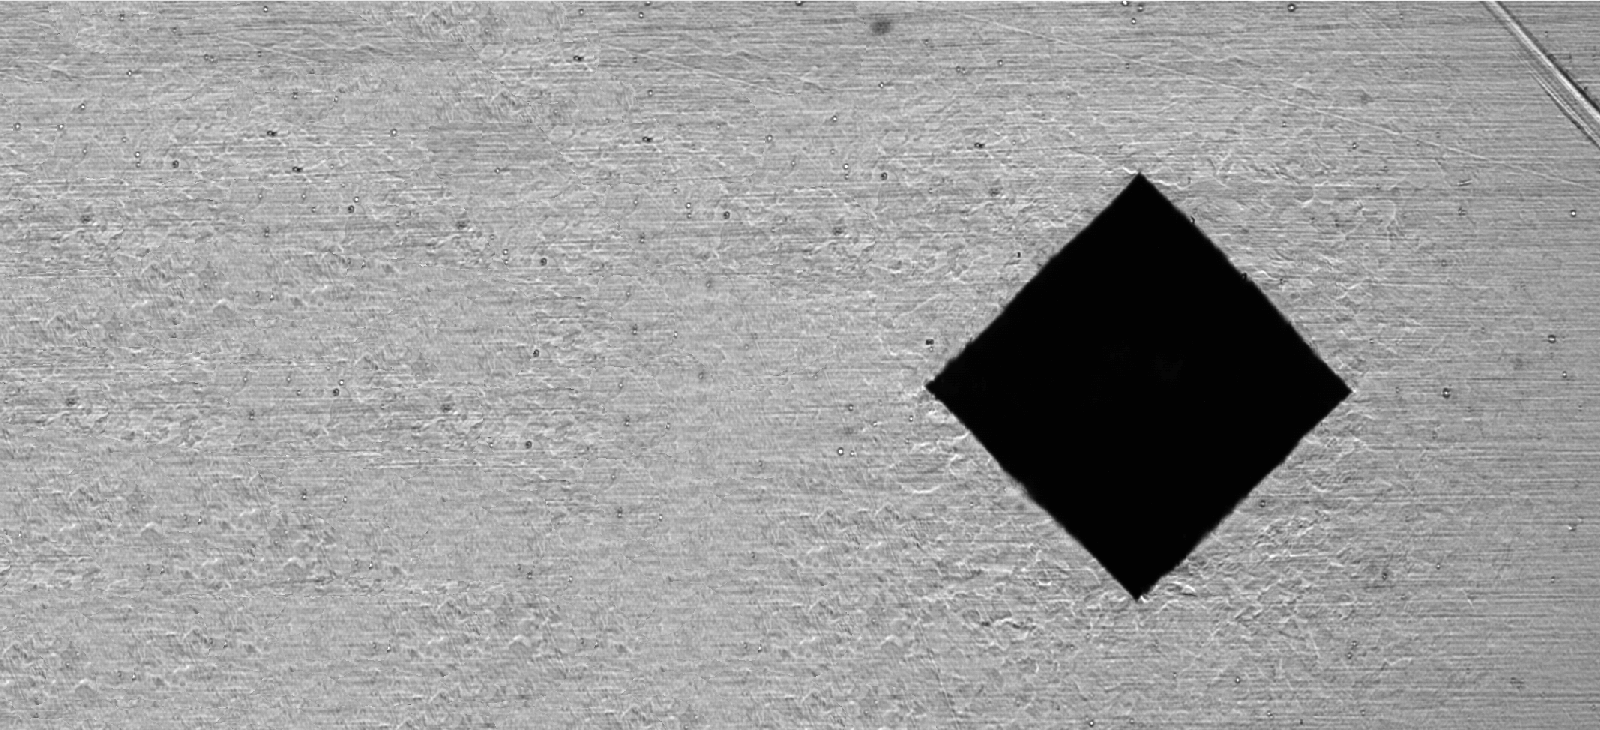
The Vickers Hardness (HV) is calculated by optically measuring the diagonal lengths of the impression left by the indenter. The measurements are converted to HV using a table or formula.
  • Load range: From 10 gf up to 100 kgf

How to measure Vickers Hardness in 7 steps

- using a Duramin-40 hardness testing machine

1. Place your sample on the stage.
2. Click and drag the mouse to move the sample into position.
3. Scroll to focus.
4. Select the test method and load.
5. Choose an objective and job name.
6. Use the overview camera to position the indenter.
7. Start the test.

Play

Surface Preparation

Before placing the sample material in the micro hardness testing machine, you should ensure it is correctly prepared.

The required surface condition for the Vickers hardness test depends on the load used.

Macro hardness testing (loads higher than 1 kgf)

  • Surface should be ground

Micro hardness testing (loads below or equal to 1 kgf)

  • Surface should be mechanically polished or electropolished

Loads

Vickers Loads table
  • Indentation time: 10-15 seconds
  • Sample thickness ASTM: At least 10 times the indentation depth
  • Sample thickness ISO: At least 1.5 times the diagonal length

Indent spacing

Regardless of the micro hardness tester you use, when you perform a Vickers hardness test, your indentation will deform the surrounding material and alter its properties. In order to avoid misinterpretations of perceived hardness, the Vickers hardness testing standards prescribe a certain distance between multiple indentations.

Steel and copper

  • At least 3 diagonal widths between indentations

Lead, zinc and aluminum

  • At least 6 diagonal widths between indentations

Diagonal widths

To ensure accurate reading of the indents, the Vickers hardness testing standards prescribe a minimum diagonal width of 20 µm.

For instance, this implies that CHD (see below) measurements using less than HV0.2 should generally be avoided, as they will produce indents smaller than 20 µm.

Vickers test methods and applications

Below you can see an overview of the Vickers hardness test methods and the most common applications.

Vicker

Case hardness depth (CHD) measurement

Surface Hardness

Hardness testing is often used to evaluate the hardness depth of surface-hardened steels. This is done by making a series of hardness impressions from the edge of the cross-sectioned sample towards the center. The hardness progression is plotted in a graph and the distance from the surface to the hardness limit (HL) is calculated.

When performing a hardness progression, it is important to observe the rules for indent spacing. Edge retention is also required during the mechanical preparation of samples to ensure an accurate measurement of CHD.
  • Case depth = Distance from surface to hardness limit

How to calculate CHD

There are different ways to determine the hardness limit. There are therefore different ways to calculate the CHD value. The procedure you choose depends on the hardening process used. The most common calculation methods are listed below.

1. Carburized or carbonitrided parts (EN ISO 2639)

  • Hardness limit = 550 HV
  • CHD (Eht) = Distance from the surface to the point where the hardness is 550 HV

2. Induction or flame-hardened parts (EN 10328 & ISO 3754)
  • Hardness limit = 80% x (minimum) surface hardness
  • CHD (Rht) = Distance from the surface to the point where hardness is 80% of the (minimum) surface hardness

3. Nitrided parts (DIN 50190-3)
  • Hardness limit = Core hardness + 50 HV
  • CHD (Nht, NCD) = (Maximum) distance from the surface to the point where hardness is 50 HV above core hardness

Example of CHD progression
  • CHD measurement displaying a CHD value of 0.95 mm at a hardness limit of 550 HV1

Vickers versus Knoop hardness testing

In most cases, the Vickers hardness test is used to determine hardness in materials in the micro hardness test load range. However, the Knoop hardness test is often used when hardness testing thin layers, such as coatings, or to overcome the problem of cracking in brittle materials.

When selecting which test to use, you should consider relevant standards, as well as the usual criteria when choosing between different types of hardness test.

Find out more about the Knoop hardness test

JOMINY TESTING

The Jominy test (End Quench Test) is a standardized test procedure used to determine the hardenability of steel, and it can be performed using any Vickers micro hardness tester.

  • The procedure is described in the following standards: ASTM A255 / ISO 642 / DIN 50191 / BS 4437
The Jominy test involves heating a cylindrical steel test piece to an austenitizing temperature (~980°–1010°C) and quenching (cooling) from one end, with a controlled and standardized jet of water. After quenching, the hardness is measured at intervals taken from the quenched end. The test method used is either HRC or HV30.

The hardness variation along the test surface is a result of microstructural variation that arises as the cooling rate decreases with the distance from the quenched end. The harder the material at a given distance from the end, the higher the hardenability of the steel.

Both the Vickers and the Rockwell hardness tests are often used for Jominy testing. When selecting which to use, pay attention to the relevant standards, as well as the usual criteria when choosing between different types of hardness test.

Find out more about the Rockwell hardness test

Hardness Testing on Welds

Hardness testing of welds

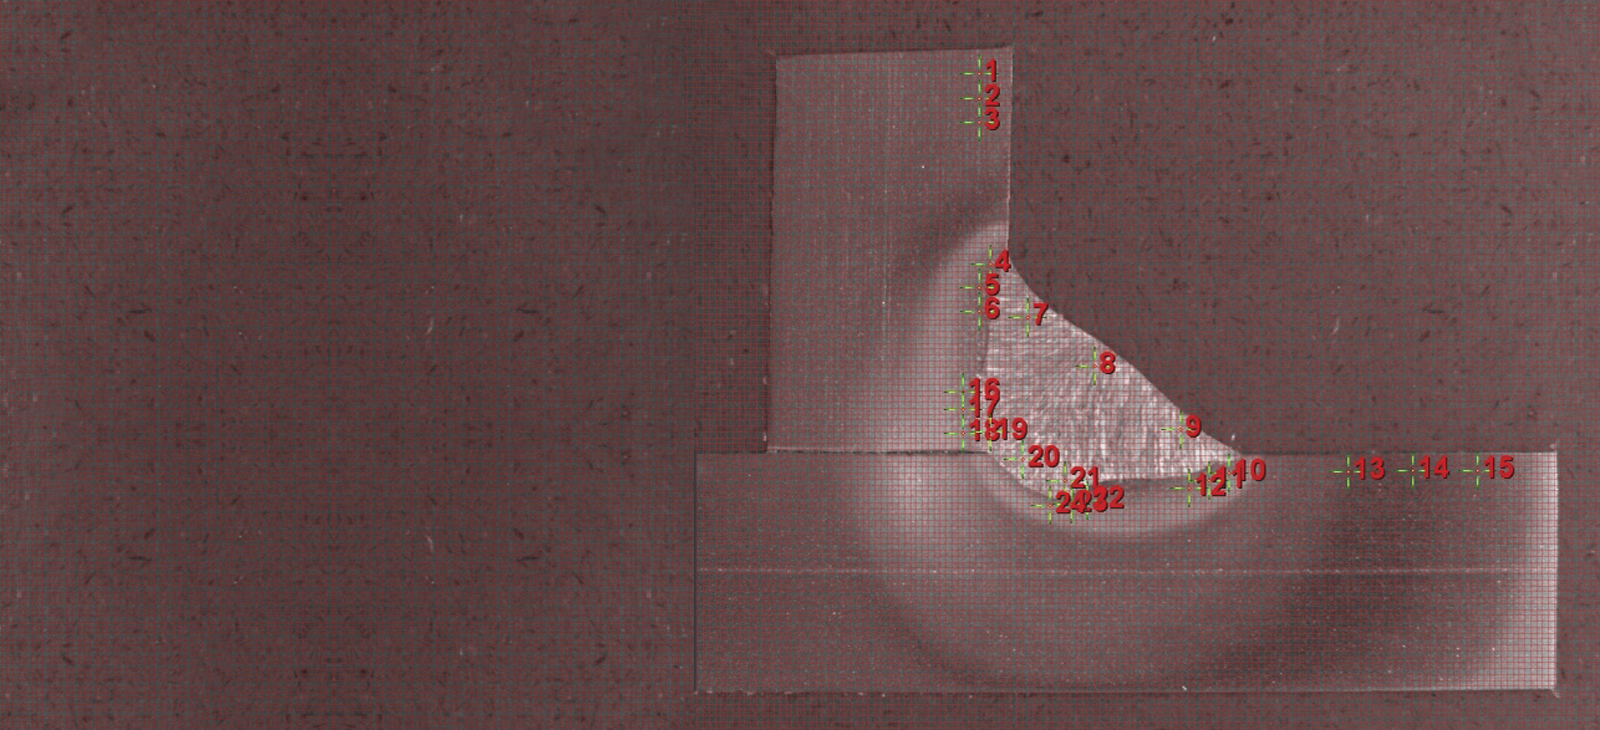
Hardness testing of welds is a subgroup of the Vickers hardness test. The purpose of these hardness tests is to evaluate the strength of the weld, with particular focus on hardness around the heat-affected zone (HAZ). This is because the hardness in and around the HAZ can help evaluate the brittleness of the weld and can therefore help you determine whether or not the weld has the strength you require. Hardness testing of welds can be performed on any Vickers micro hardness testing machine.

When hardness testing of welds, a series of measurements are made in a given pattern at a specific distance from the sample edge or top of the weld. The progression of the hardness values can then be plotted in a graph.

  • Methods typically used: HV5 and HV10
  • Applicable standards: ISO 9015-1/-2

VICKERS HARDNESS TESTING MACHINES (HARDNESS TESTERS)

Hardness testing is key in most quality control procedures. That’s why we provide a complete range of hardness testing machines, including micro hardness testing testers for Vickers.

As one of the leading Vickers hardness tester manufacturers, all our universal, macro and micro hardness machines are designed for accuracy, ease of use and long-term reliability.

Machines

Duramin-4: Manual Micro and Micro/Macro Hardness Testing Machine
Load ranges: 10 gf – 2 kgf, 1 kgf – 62.5 kgf

Duramin-40: Semi-Automatic and Fully Automatic Micro/Macro Hardness Testing Machine
Load ranges: 10 gf – 10 kgf, 10 gf – 31.25 kgf, and 1 gf – 62.5 kgf

Duramin-100: Fully Automatic Micro/Macro/Universal Hardness Testing Machine
Load ranges: 10 gf – 62.5 kgf, 10 gf – 150 kgf, 10 gf – 250 kgf

Duramin-600: Semi-Automatic Universal Hardness Tester
Load ranges: 1 – 250 kgf, 3 – 750 kgf, 5 – 3000 kgf

Duramin-650: Semi-Automatic and Fully Automatic Universal Hardness Tester
Load ranges: 1 – 250 kgf, 3 – 750 kgf, 5 – 3000 kgf

Check out our complete range of Duramin hardness testers.

Delve

DELVE DEEPER INTO HARDNESS TESTING

If you would like to know more about the hardness testing methods for metallic and other materials, including a full definition of hardness testing, the different applications of hardness tests and how to prepare for hardness tests, download our resources.

Find all you need to know about hardness testing

Download our Hardness Testing Application Note

Contact us!

icon-arrow